 |
| Finished front Pardon my phone (and my messy workspace!) |
 |
| Finished back |
There's a lot of debate among costumers as to whether or not corsets- commonly called "bodies" or "pairs of bodies" in period sources- were used much in 16th century Italy. There's loads of evidence for them in England by the Elizabethan period, quite a bit in Spain, and even an extant pair from Germany, but the Italians seem to have prefered stiffened dress bodices rather than separate support garments. This makes sense to me, since Italians were living in a much warmer climate than the English or the Germans, and so presumably would have been more comfortable with fewer layers. That said, by the end of the century, dresses in portraits look stiff enough to me that I suspect either the bodices were made like corsets or the Spanish pair of bodies had come in to style. There is an extant pair from Florence dated to 1562, but it's unclear whether this is a "pair of bodies", or corset, or a "petticoat bodies", which functions to hold up an attached underskirt as well as provide a little bust support. Either way, though, this garment belonged to Elenora of Toledo, the Grand Duchess of Tuscany, who was of Spanish origin, so it's hard to be sure how much this says about what Italians were wearing. Personally, I'm of the opinion that in Venice at least- which is where my focus is- corsets weren't in common use until very late in the century.
So why am I making one, you ask? I do want to make at least one Elizabethan ensemble, so I need a pair of bodies for that- I have an could use a petticoat bodies, but that's a lot more bulk than I want to wear, especially at outdoor summertime events. I'm also planning a doublet and hose for myself, and I don't really want to go to the trouble of trying to make a doublet bodice supportive enough. I refuse to wear a modern bra under 16th century clothes, so a pair of bodies is required. Finally, I intend to eventually make a Florentine dress in a style similar to the one Elenora wore over her bodies, and I'll need it for that outfit!
Since examples are few and far between for these things and the time and place I focus on probably didn't use bodies anyway, I wasn't especially concerned with historical perfectionism on this piece. Tudor Tailor has patterns for two English styles of corset, but they're both fully boned and I don't really want to spend that kind of time sewing boning channels. Boring! Instead, I chose to base my bodies on the style of that German example I mentioned earlier, worn by Pfalzgrafin Dorothea Sabina von Neuberg, dated to 1598. It's featured in both Tudor Tailor and Patterns of Fashion, so I have both step by step instructions and detailed diagrams to work from. It's also much more lightly boned- only to the underbust and at the center back, so that's a lot less work for me. There's only one problem: the center front is designed for a separate busk, and the bodies lace up the back. As someone who wants to get dressed on her own, this is an issue, so I adjusted the pattern for front lacing by omitting the busk.
I also decided there was no point in starting from scratch when I already have a perfectly good bodice pattern that's shaped pretty much the same way, so rather than trying to scale the pattern up from a book, I just used the bodice pattern for my Venetian gown, omitting the Venetian back point to allow for waist tabs. This is the same pattern I used for my blue linen Venetian dress, but with an elongated front point. The front gap on this bodice makes it ideal for a corset, since it allows for any give in the fabric. Since I've made a dress from this pattern already, I know it fits and therefore didn't bother with a mock up. I cut out two front pieces and one back in fashion fabric, lining, and canvas.
 |
| One of the front pieces marked out for the bones. Pins hold the layers together while I work. |
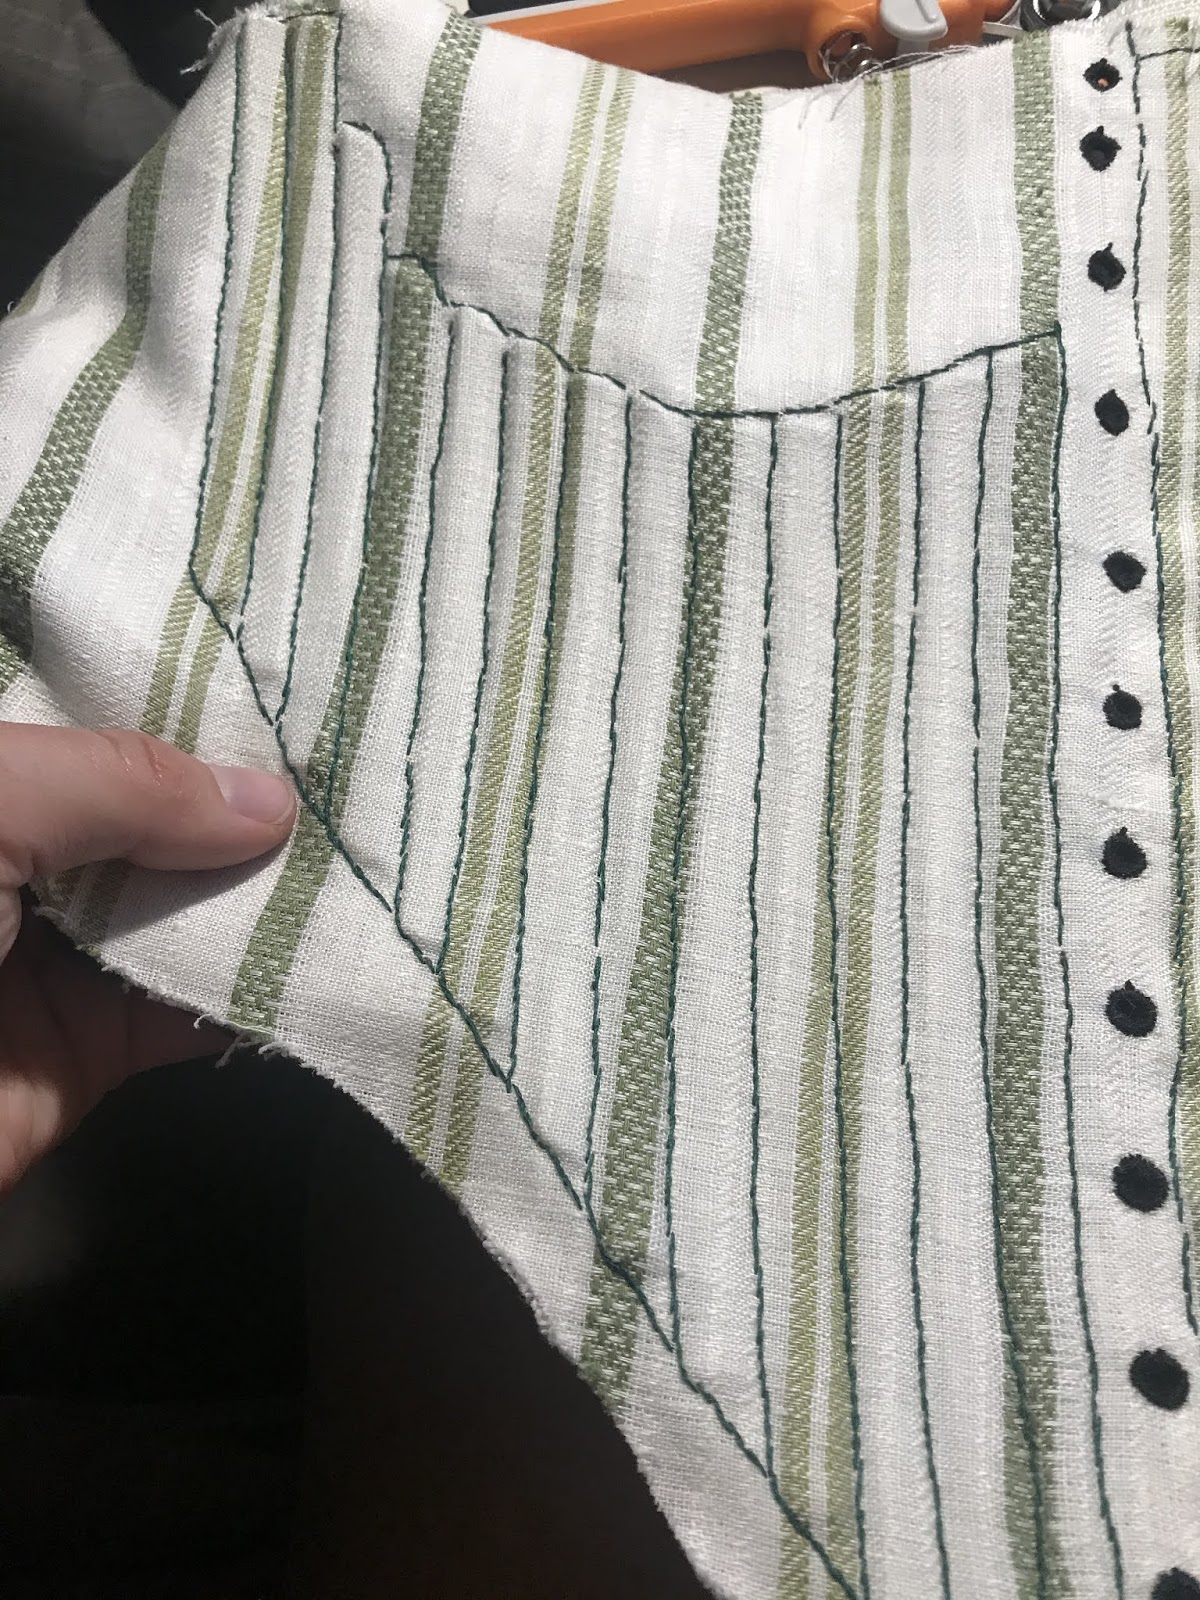
I then went on to the front pieces. I made the first chanel along the edge that will be the front center of the corset, and then handworked the lacing eyelets for one side. This is much easier to do before adding the bones, as I discovered when I was making the waist eyelets at the end. I really should have done that at this stage! Then I made the rest of the boning channels, which only come to the underbust, creating "cups". Then I repeated the process on the other front piece.
Making eyelets in four easy steps:
 |
| Step 1: poke a hole. I use an awl, but I read that some people use a knitting needle or similar. |
 |
| Step 2: 4 little whip stitches, one on each side, to hold the hole open while you work. |
 |
| Step 3: whip stitch (or buttonhole if you prefer) all the way around once, |
 |
| Step 4: stitch all the way around again. |
Then I basted the pieces together and tried the bodies on. They mostly fit, but I forgot I had been meaning to shorten the back a little. The extra length isn't a problem in my gown, but it is with the bodies. I was also having a weird problem with some gapping at the top of the back. So I ripped out the basting on the side seams and cut a little material away at the bottom edge of the back piece and the sides where the side seams go, just under the arms. I basted the whole thing together again, tried it on, and since the major issues were fixed, I then back stitched over the basting to give the side seams as much strength as possible. I also covered the inside of the seams with the same ribbon I was going to bind the edges with at this stage.
 |
| Binding the inside seams. |
Next, I added the bones to the front of the bodies. I used synthetic whalebone because it's closer to the whalebone used in late 16th century examples than plastic boning, and I expect it to hold up better. I then tried them on before boning the back, and I'm glad I did because I realized that the back of the garment didn't really need all six bones. I decided to only add two to prevent the back from rolling up at the center. I suspect the bones at the center back of the original were mostly there to keep the lacing straight, but since I adjusted for front lacing, this isn't an issue. I'd still sew the channels or something to hold the layers of fabric together- and stiffen the back- next time, though.
 |
| Inside front, with bones. |
 |
| Waist tabs, trimmed to size. |
 |
| Binding the edges of the tabs |
Finally, I just had to bind the raw edges. I did this using black grossgrain ribbon because I didn't feel like making bias tape. I just whip stitched the ribbon first to the outside and then to the inside, taking care to keep things neat in to corners and curved edges. The last step was to make 3 sets of eyelets at the waistline for pointing my petticoat to the corset.
All in all, I think it turned out well. This is a utilitarian piece- it's underwear, after all!- and it does its job well. It's pretty comfortable to wear, too, and there's enough extra room in the lacing for me to gain or lose a few pounds and still have it fit. There are a couple of things I'd do differently next time, but they're mostly just things that would make the construction easier, like making all the eyelets before adding the bones. The only one that's really for aesthetic purposes is that I'd add another full length bone on the other side of the lacing eyelets to prevent wrinkling, but that's not bad enough for me to redo anything. I don't think there will be a next time unless this one wears out!
 |
| Finished inside |
 |
| Finished outside |
