Showing posts with label accessories. Show all posts

Tuesday, December 1, 2020

December Update

Partlet for a 1560s/70s Venetian outfit


 It's been a busy couple of months, and I haven't posted anything new, but that doesn't mean I haven't been sewing! I was working like a maniac for Halloween, making a full 1560's or '70's Venetian lady's ensemble for a friend, which was wearable for the day but still needs some work.  I also made a padded arming cap to prevent Younger Brother's helmet falling into his eyes.  I'm currently working on a lady's jerkin in gold silk (post coming soon!), but buttonholes are boring, and working on just one project for a long time sometimes gets monotonous, so I've also taken breaks from the big project to do little ones.  I made a cute embroidered apron to go with my working class dresses (a new one of those coming soon, too!), and am making myself a new camica because one isn't really enough if you plan to be in garb for a few days in a row.  

Apron embroidery


I've also done a lot of planning work for upcoming projects.  Working out the pattern for the jerkin gave me the bodice pattern I need for a fitted gown I'll be making this winter.  I'm in the middle of researching arming doublets of the mid to late 14th century as part of my brother's 14th century knight's gear.  I've mostly designed a 16th century Italian working class outfit I'd like to make for hot days at Faire in 2021.  I've figured out what pieces I'll need to make for the 15th century Florentine ensemble my mother wants, which meant hours of looking at 15th century art and showing her recreations of gowns.  I took advantage of Black Friday to get a lot of supplies for upcoming projects, including a German Trossfrau dress I've been wanting to make since I first saw pictures of them.  


Gold silk jerkin


I've also been working on getting an Etsy shop going for historical clothing.  Deciding how to stock it has been a challenge, though.  Some stock items, and other things made to order, perhaps?  I hope to have my shop going in the new year, so I'd better hurry up and figure it out!

So all in all, it's been a productive two months or so since I last posted, but it's also been the kind of productive that doesn't really mean a lot of pictures here.  Don't worry, it's all coming soon!


Blue velvet gown, not quite finished

Monday, July 20, 2020

Progress on my Venetian Ensemble!


Failing a bit at "serious Renaissance portrait face," but you can
see the new accessories pretty well in this shot.  Don't mind the
modern second ear piercings I forgot to take out for pictures!

My local Renaissance Festival may have announced the cancellation of their 2020 season last week, but that doesn't mean I'm not still working on garb!  In between medieval pieces for a friend, I've done some work on my Venetian ensemble as well.  I made some coral earrings to go with my coral necklace last month, and hemmed some silk organza to make a veil.  I also bought some veil pins and another ring that works for the 16th century online.  It's not much, but I think it really helps pull my outfit together!


All the new things, plus the 2 rings I already had that can
pass for Italian Renaissance.  I'm really pleased with my
new earrings!


There's still some work to be done on this outfit.  I still think the skirt could use a little more volume to look like what you see in 1550's and 60's art, and I'm currently working on a corded petticoat that will (hopefully!) help with that.  I also plan to make a fancy underskirt, though I haven't even found fabric for that yet.  
Better serious Renaissance face here!
Unfortunately, Colorado looks
nothing like Venice.

I also need to add hooks and eyes to the slit in the skirt to hold it closed.  I thought it looked fine before, but I've been looking at more portraits, and the skirt is almost always closed just under the edge of the bodice.  I safety pinned it for these pictures, which makes it hang a little strangely.

I really need to fix my sleeves, too.  They're a little too tight at the top edge, which makes getting dressed difficult and also causes my sleeves to work their way down my arms, pulling the straps of the bodice with them.  Venetians were fond of the edge-of-the-shoulder look, but these are pulling too far and making it a little difficult to use my arms.  Plus it's creating a weird situation with my camica and partlet that needs constant adjusting.
The weird sleeve-strap-partlet-camica situation
is easier to see here.  I think I didn't leave enough
ease when making the sleeves, and then went back
to work after the quarantine and my arms got a little
more muscular, so the problem with fit became
much more obvious.

I plan to fix this by removing the stitches holding the panes together and adding a slightly bigger strip of fabric around the top edge of the sleeve in their place, adding maybe an inch to the sleeve circumference.  Will update with results.  I also plan to make a second pair of sleeves out of a remnant of silk brocade, which I'll do in the new way if that works better.  I also think that part of the problem is with my camica being a little too wide in the neck, though I haven't decided yet if I'm going to re-work it or just make a second one.  That depends on the results with the sleeves.  All in all, though, things are coming together nicely.  Now I just need somewhere to wear this...  Perhaps the grocery store?  Or my day job?


Another veil pic.  Because I think my veil is awesome.
So flowy and cute!  I need to get better at pinning it,
though.  


Monday, July 13, 2020

14th Century Belt Purse


This piece is part of a medieval ensemble for a friend I've been working on on and off for the last several months, designed around her wanting to wear a dress but also carry a sword for RenFaire.  As such, we were more concerned with putting together something fun than being particularly historically accurate.  As such, the various pieces of the outfit don't all come from the same time period, but it's going to look cool for Faire, which is all that really matters in this case.  The purse itself is pretty accurate, though, so I thought I'd share it here!

This purse is based on the drawstring belt purses seen in a lot of late medieval manuscripts, which come in a variety of shapes.  These purses are mainly from the 14th and 15th centuries, putting them about 400-500 years after the dress and hood this is going to be paired with, but it's for fun, not reenactment, so I decided to go with it.  Besides, they're cute, but wouldn't go with my 16th century wardrobe, so when else am I going to make one?
71 Best Kirtles images | Medieval clothing, Medieval costume ...  83 Best Garb - GFD Necklines images in 2020 | Medieval art, 14th ...  Image result for "15th century" gown with demicient belt ...

Most of the manuscript purses appear to be rectangular, though some are a little pointier.  For no particular reason, I decided to make my purse pointed at the bottom, though it turned out a little more round than pointy.  I can't quite tell of the purse on the left has tassels on the drawstrings or not, but the one on the right clearly has either small tassels or pom poms all over it, so I decided that a little decoration was acceptable.  I also chose to coordinate the purse with the rest of the outfit for no particular reason other than that I didn't want to have to find fabric for it and I had leftovers from the dress and hood.  I also chose not to buy cording or decoration, again mostly to avoid overspending, and tried making my own braided cord.

The grey wool hood fabric and the red
linen dress fabric look cute together,
so why not use them, right?
Once I figured out what I was doing, this purse came together really quickly.  I cut out front and back pieces in both the red linen lining and the grey wool fashion fabric.  I sewed the lining pieces together "right" sides together, and then repeated the step with the wool, this time leaving a gap at the center bottom for the middle tassel.  Then I made the tassel by simply folding 6 strands of yarn in half and knotting them, then trimming the ends to the same length.  I inserted this in the gap in the wool body of the purse, leaving the end I wanted to show between the right sides of the fabric.  I then flipped the whole thing inside out and pressed the seams.

Next, I made the braids.  For the strap, I used 12 strands of a medium thickness acrylic/wool blend yarn, tied a knot in one end, divided into 3 sections, and braided tightly.  When that was done, I knotted the other end and cut down the ends to make tassels.  I then repeated the process with only 9 strands of yarn to make the drawstring.

Making the drawstring channel. 
Lots of pins to hold the fabric in place.
Inserting the drawstring
Closing the channel and
finishing the edges.


The last step!  Whip stitching
the strap to the bag.
Then back to sewing.  I inserted the lining into the outer shell of the bag and made sure the seams lined up properly.  Then I backstitched a seam near the top to create a channel for the drawstring.  I made 2 eyelets in the center front of the drawstring channel, inserted the drawstring, and then finished the raw edge of the lining as well as the top of the channel by folding the raw edge in and whip stitching the lining to the shell.  I didn't have any raw edges to finish on the shell because I had used the selvedge as the top edge while cutting.  Finally, I pinned the strap to the sides of the bag and whip stitched them in place.  Done!

This was probably the easiest project I've done in a while, and certainly the quickest.  And I (kind of) learned a new skill, so yay!  I was really pleased with how the braids came out, as I was sceptical of using yarn for trim, but they're cute!  I'm now considering making braided trim for an upcoming project rather than spending on the velvet ribbon I was going to buy... We'll see!


Thursday, June 4, 2020

I Made a Pocket!


Did you know that enormous pockets were the norm in the Renaissance?  Neither did I before I started doing serious research on 16th century clothing.  They started to appear in the late 14th century, and remained in fashion at least through the 18th, but went out when sheer dresses came into style around 1800.  Ladies' pockets tied on around the waist, rather than being sewn into the garment, and would look a little funny under a sheer gown!  I have no idea if they came back in under the more modest dresses of the Victorian period or not.  So if you've ever wondered, like I did, why medieval people usually have purses or pouches but Renaissance people usually don't, this is why!

So, naturally, I had to have pockets!  Or rather, pocket, singular, since one is more than enough space to hold everything I need with me at Renfaire!  I made one last year when I was just getting into historical sewing, and it works well, but the tie- which will show under my open bodiced Venetian dress- is red, so I'm making another using the same method.  The pocket and its tie are made of a midweight white linen that matches my camica well so it hopefully won't be too obvious.

I decided to embroider my pocket, mostly for fun and to practice my embroidery on something that won't actually show when I'm wearing it.  First I outlined the front piece of the pocket on the fabric, making sure I gave myself enough room to store the essentials- phone, lip balm, wallet, sunscreen, etc.  Then I drew a simple, Italian inspired but not quite historical spiral pattern on the pocket in blue tailor's pencil and put the whole piece of fabric in my embroidery hoop.  doing the embroidery before cutting helps prevent your pattern piece from fraying while you embroider it!  Since this piece isn't actually going to be seen while I'm wearing it, I didn't do anything too elaborate.  It's pretty much all stem stitch with a little satin stitch, all in 3 strands of wine red DMC floss.

Once the embroidery was done, I folded the fabric over and cut out the front and back pieces together, leaving a double seam allowance so I can do French seams.  I pinned the two pieces together, wrong sides together, stitched using half the wide seam allowance, trimmed the seam allowance, flipped them right sides together, and stitched again to create a French seam.  I usually prefer flat felled seams for garments, but the bulk of a French seam doesn't matter on a pocket.

I stitched up the bottom and both sides of the pocket with French seams and then made a tie by sewing together thin strips of linen to make a total length long enough to wrap around my waist and tie a bow.  I sewed this to the pocket, right sides together, then flipped it, tucked in the raw edges, and whip stitched the entire length.

This project was really quick and easy, apart from the embroidery, which took some time.  I really like how it turned out, though I realized after the fact that I accidentally made it a lot smaller than my other pocket.  It still has enough room for everything I need, though, so this doesn't matter much!  I also tried it on with my Venetian dress, and the tie blends in with my camica well enough that it's not really noticeable.  So that's one more small piece ready to go for this year's RenFaire!

Monday, May 25, 2020

Venetian Partlet/ Falling Ruff

My new Venetian partlet/ falling ruff!


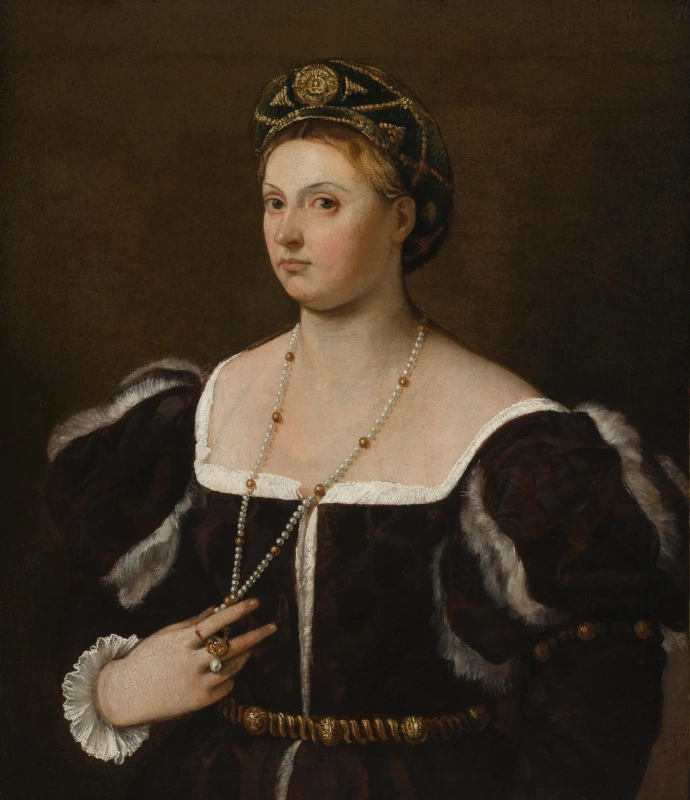
The ruff is probably the most quintessential piece of late 16th century fashion, but as far as I can tell, the big round dinner plate ruffs you see in late Elizabethan England were never common in Venice, and in the 1560s and '70s, the "ruff" seems to be more of a ruffle attached to the partlet.  Since most of my wardrobe is mid-century Venetian, I decided to make one of these.

The Venetian "falling ruff" is pretty common in portraits from the second half of the 16th century, as are partlets with no ruffle.  Some of the partlets appear to be linen, and others appear to be sheer silk, though the ruff almost always appears to be linen and/or lace.  This leads to the interesting idea that perhaps some ruffs were detachable, and not an integral part of the partlet, but for the sake of simplicity, I decided to make mine one piece.  I may make another one in the other style at a later date, though, in a fancier fabric.

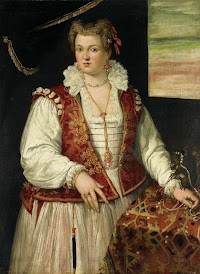
Francesco Montemezzano, 1565-75
This partlet/ruff appears to be linen, trimmed
in lace.  I think I got pretty close to this look!
For this partlet/ruff, I'm using the same sheer white linen I use for 16th century chemises.  I used it for a ruffle collar on an Elizabethan chemise once, and it worked well for that, so why not, right?  It's not going to be completely plain, though!  Many of the partlets and ruffs in portraits appear to be decorated, often with pearls, lace, or blackwork or metallic embroidery.  I'm not very good at embroidery and mostly see pearls on collarless partlets, so I'm using some lace to make this elegant enough to go with the silk gown I'm planning.


The internet, Tudor Tailor, and common sense tell me a partlet pattern looks something like this:


Two front pieces and one back piece, in this case with a rectangular collar and a ruffle.  The measurements on my diagram are mine.  Shoulder seam to neck, and top of shoulder to underbust for the front, Shoulder seam to shoulder seam for the back, and collar bone to collar bone around the back for the collar.  Venetian partlets in portraits usually appear to have a v-neck effect, so I made my pieces a little narrow at the top and wider at the bottom.  There should also be a small semicircle cut out of the middle of the back top to accommodate the neck.  I'm going to do that when I have the shoulders sewn up, though, because I'd rather eyeball it than do math.  I'm also opting to make ties for the bottom out of ribbon rather than sewing them, because this makes my life a lot easier.  Some people pin their partlets on, or just make them long enough that they stay in place, but I prefer ties at the sides, so that's what I'm doing.


Very long ruffle, stitched together and
hemmed.  See my tiny (less than 1/2
inch) seam?
First, I attached the front pieces to the back with flat felled seams at the shoulders.  This is my favorite method of finishing seams because it hides all the raw edges without the bulk of French seams, but if you prefer French seams, they're also common in period.  Next, I tried on the partlet and cut out the back neckline.

Then I moved on to the ruffle.  I cut out my ruffle in several pieces to conserve fabric, resulting in a total length of about 48 inches, 4 times the length of the collar.  Since it was in pieces, the first step was to sew the pieces together, again with flat felled seams.  I then hemmed one side and both ends, and then attached the lace.

Sewing on the lace!
This is how the ruffle looks pinned to
the neck band.  Time to stitch!
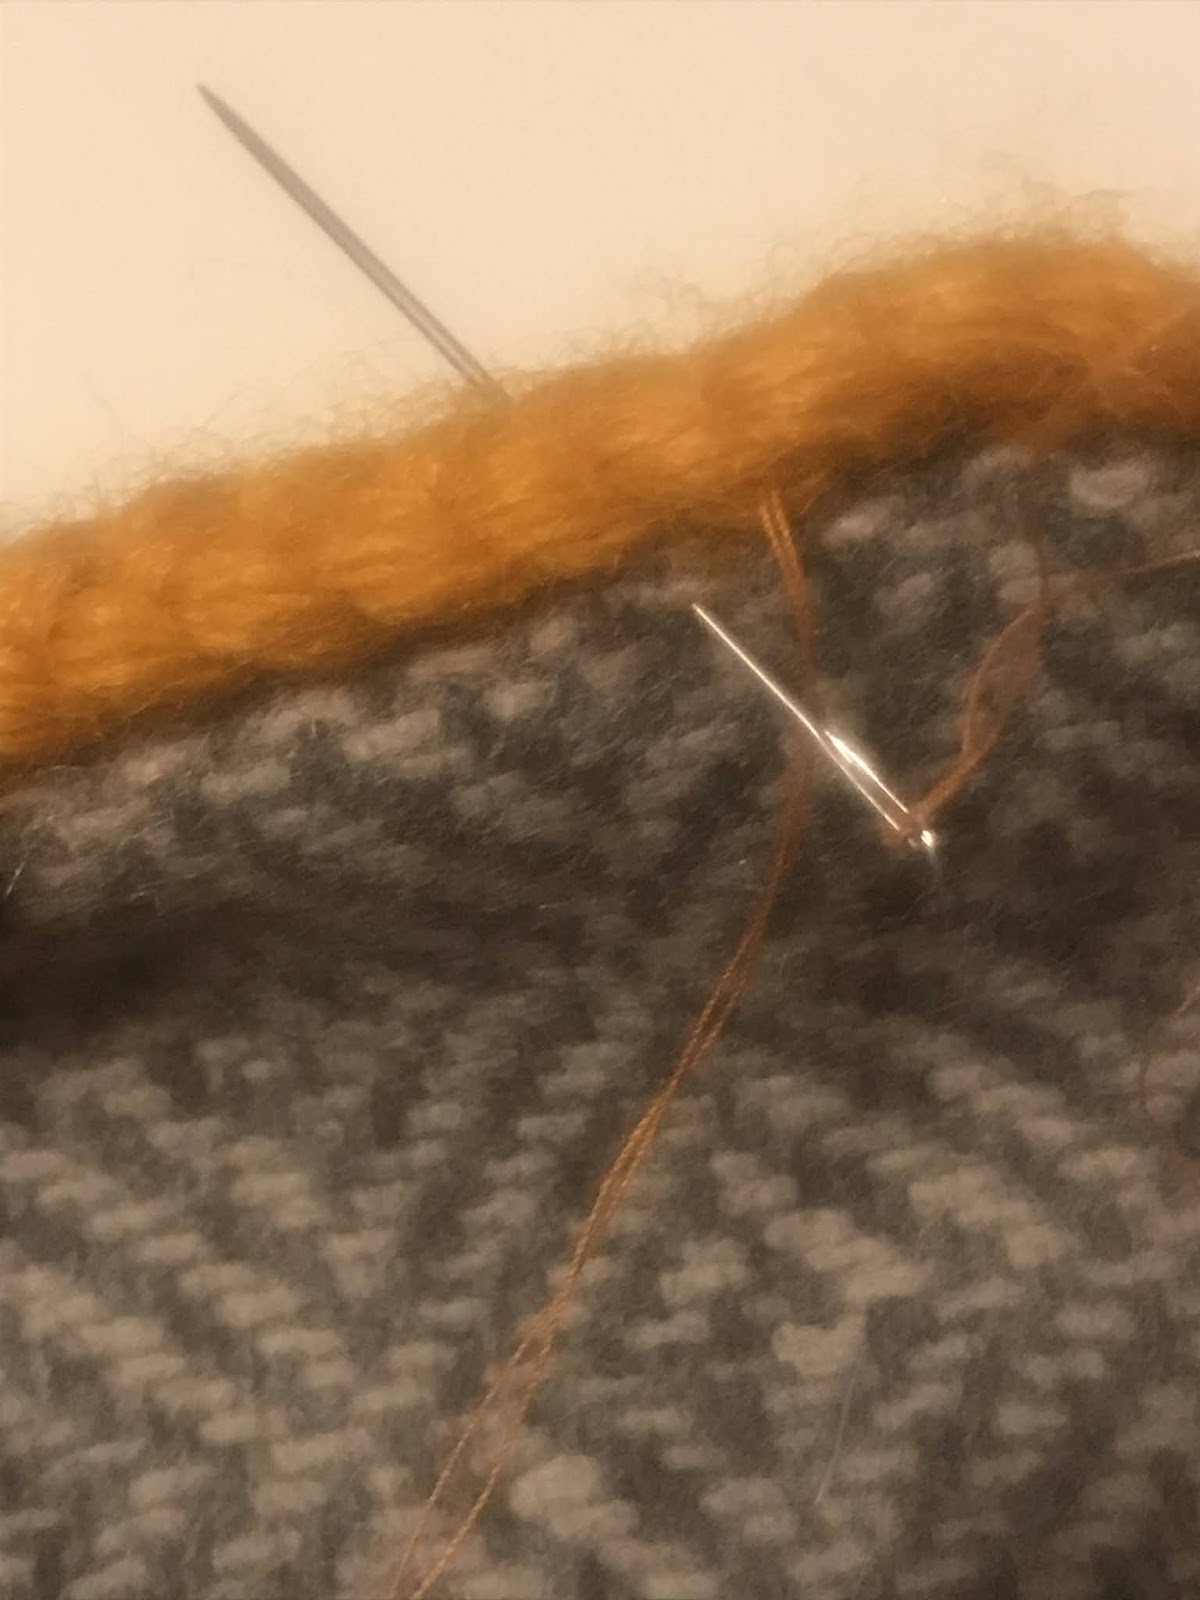
Next, gathering the ruffle into the neck band.  Using very small gathering stitches, I gathered the ruffle to the length of the neck band. Then I pinned and stitched the ruffle to one of the neck band pieces.  This was kind of a pain.  Normally, I would use a whip stitch and be sure to catch either side of each pleat, but I was worried about the raw edges of this delicate linen holding up and wanted a bigger seam allowance, so instead, I stab stitched the two together, still stitching on either side of each tiny pleat.  Kind of annoying, especially since the edges of the lace kept catching the thread, but it worked.
Whip stitching the ruffle to
the neck band.

Then I sewed the neck band to the partlet, leaving seam allowances free at either end.  In retrospect, I should have pinned both neck pieces to the ruffle at the same time, but I didn't think about that until the first one was sewn on already, so the next step was attaching the second neck band piece to the ruffle.  This time, I just pinned the pieces right sides together and whip stitched over the edges, which was a mistake- I missed some of the raw edges of the ruffle, and had to go back and redo sections.  This may not have been a problem if I had been more careful the first time, but then again, I couldn't see all the layers very well.

Finally, I just had to attach the second neck band piece to the partlet.  I did this by folding the raw edges under and using tiny whip stitches, making the stitches as invisible as possible.  I put this seam on the outside of the partlet rather than the inside like I normally would because the ruffle falls over this seam, so it's actually less visible than the inside of the neck band.  This is also the side of the ruffle with visible stitching attaching the lace and holding the pieces together.  The outside of the ruffle is the underside, so this won't show when it's being worn.

Using small stitches to attach
the neck band to the partlet.
Once all the pieces were sewn together, all the "tricky" parts of this project were done!  Now all I had to do was hem the partlet and add the underarm ties and trim on the neckline.  Nothing complicated here, so this all went pretty quickly.

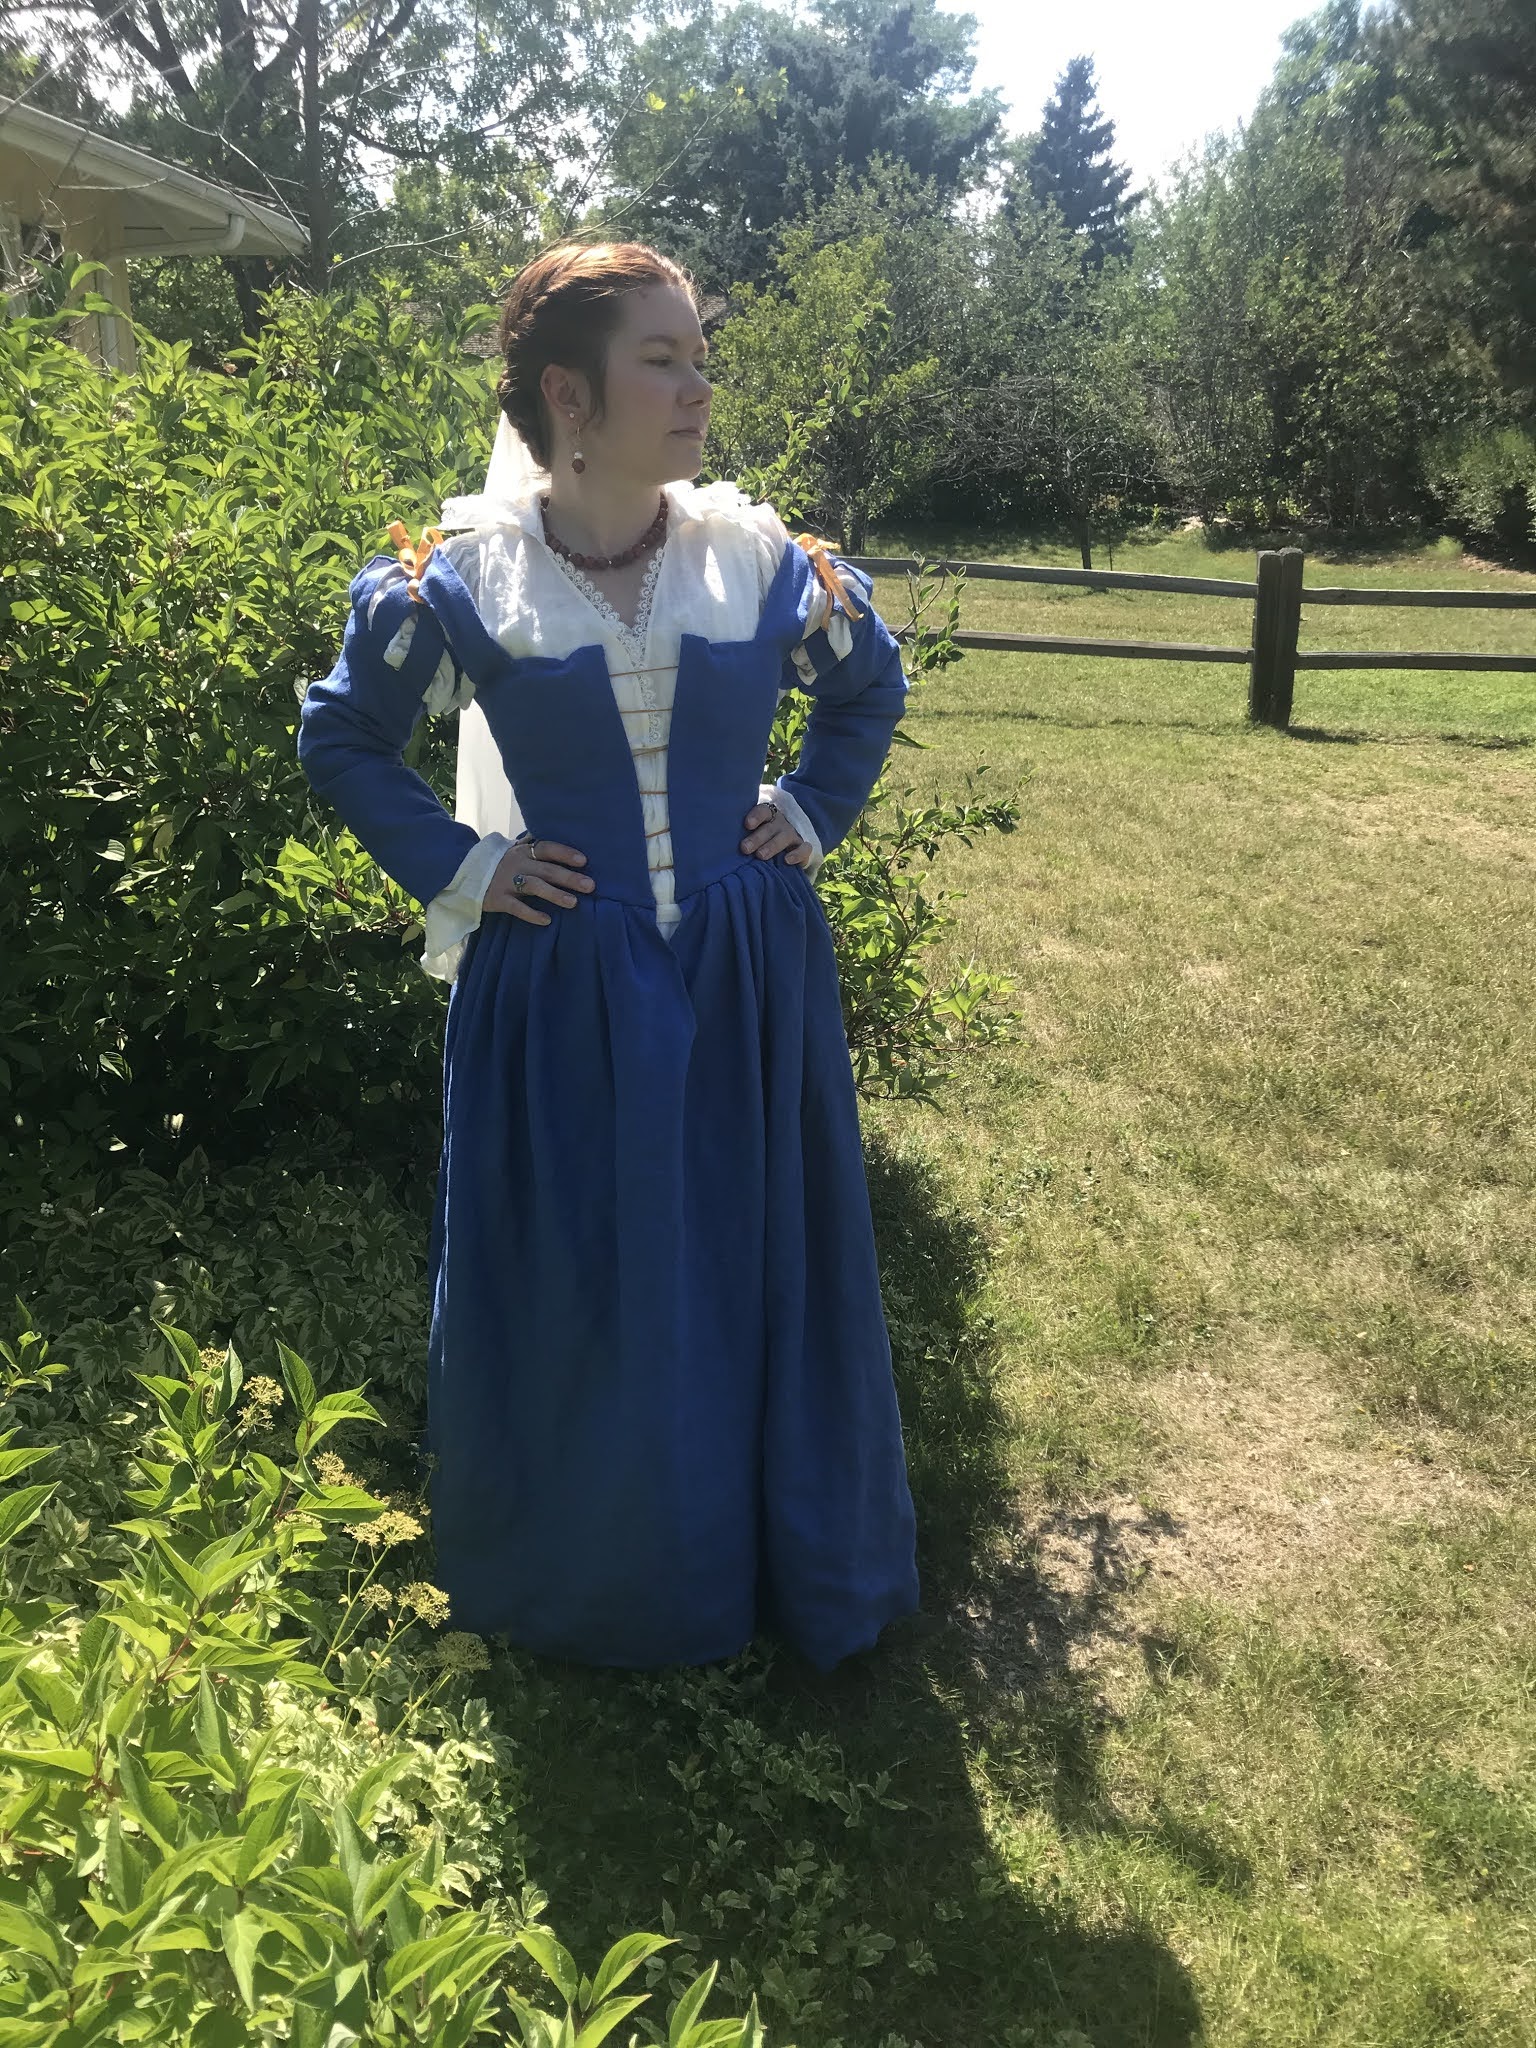
That's it!  All done!  One step closer to a complete mid-16th-century Venetian ensemble!


One step closer to a complete ensemble!


Monday, May 4, 2020

Coral Neckalce


No 16th century lady's ensemble is complete without jewelry, but so much of what is marketed as "Renaissance" on the internet is definitely not historically correct for the Renaissance (or any time, really), so I decided to try to make my own!  And it actually turned out well!  I'm not a jeweler, and won't be trying any metalworking or anything complicated anytime soon, but if I can do this, you can too!  

I wanted something in the style of 16th century portraits, but wasn't trying to recreate a specific piece- I just need something to go with my wardrobe!  So the first thing I did was look at a bunch of portraits.  Google Images and Pinterest are both great for this, though you should always be sure to check that the image you're looking at is from the right region and period!  Pro tip: know the names of a few portrait artists from the right time and place for what you're making.  This makes searching easier, because you can search for "artist name portraits" rather than "time, region portraits."  This generally gets you much more relevant results.  I most commonly do 16th century Venetian clothing, so when I need images, I search "Titian portraits."  

Portrait of a Lady ('La Schiavona') - Titian
Portrait of a Lady (La Schiavona),
 Titian
Titian Vecelli. Portrait of a Woman
Another Portrait of a Lady,
also Titian
The vast majority of the wealthy ladies Titian painted wore pearls when they sat for their portraits, but that's OK because my main goal was to look at the styles of jewelry these ladies were wearing, not the type of stone.  While there were a few long necklaces like the one the lady on the right wears, most of the mid century portraits feature shorter chokers like the one on La Schiavona.  Since this style is both more common and less likely to drive me insane when wearing it, I decided to go with the choker.  The next step was to decide whether to mix the coral beads, or just string a bunch of the same.  Time for more portraits!

Andrea Solario (Italian Renaissance painter, active 1495-1524) A Woman with a Lute c 1510 (2)-1
The Lute Player,
Andrea Solario, c 1510
I found mostly just plain coral necklaces, beads all fairly large and the same size, but there were quite a few coral with pendants, a few coral and gold beads, and the occasional coral and pearl, like the one on the right.   There were also a few cases of pearls with gold beads or other stones, like the unnamed lady above.  Since I was just trying to get the look without recreating a specific piece, I decided that the fact that mixed bead necklaces were definitely a thing gave me enough room to play around and design something.  

Deciding how to string my
necklace.  So many possibilities!
I'll just have to make another!
I had ordered coral and faux pearl beads in two different sizes a couple of weeks ago when I gave up on finding anything that looked right for a reasonable price, so I messed around with stringing those until I came up with a pattern I liked.  I then cut two pieces of black ribbon long enough to make a bow (I'm pretty certain I've seen this in 16th century Italian portraits, and I didn't have any clasps on hand!)  I used poly satin ribbon, so I finished the ends by melting them slightly, and then I folded one end of one of the ribbons over as if I was hemming it.  I threaded the smallest needle I could find with a long piece of very skinny perle cotton, tied a knot, and made a couple of stitches through the folded end of the ribbon.  I then tied another knot and started stringing the beads, tying knots on either side on the tiny pearls but not bothering with them around the large coral beads after I found that the holes in these beads were bigger than the knots.  

Once I knew what I was doing, this project went really quickly!  It took me about 45 minutes to string all the beads and finish the end.  It's really unusual for my research step to take a lot longer than actually making the piece, so that was fun!  I will definitely be doing this again soon, though I intend to get real beading thread before I do that (I think that's part of why the knotting didn't really work properly), and either historical looking clasps or some silk ribbon.  I really like how this piece turned out, though!  Now I just need some earrings to go with it...

Plenty of beads for more jewelry!  Yay!
It also cost me a lot less to make this necklace than buying a similar one would have.  The lowest price I saw on a decent looking one online was around $25, plus shipping.  I found the beads on Etsy for $25, including shipping, and had the ribbon and thread on hand.  All told, I used about $10 worth of product for this necklace, and I have beads left over for at least 2 more different ones (I used almost all the large corals).  That's 3 for the price I would have paid for one!  And I, with no real jewelry-making experience, did it in an afternoon, with no major issues!  I'm very glad I decided to try this!