No 16th century lady's ensemble is complete without jewelry, but so much of what is marketed as "Renaissance" on the internet is definitely not historically correct for the Renaissance (or any time, really), so I decided to try to make my own! And it actually turned out well! I'm not a jeweler, and won't be trying any metalworking or anything complicated anytime soon, but if I can do this, you can too!
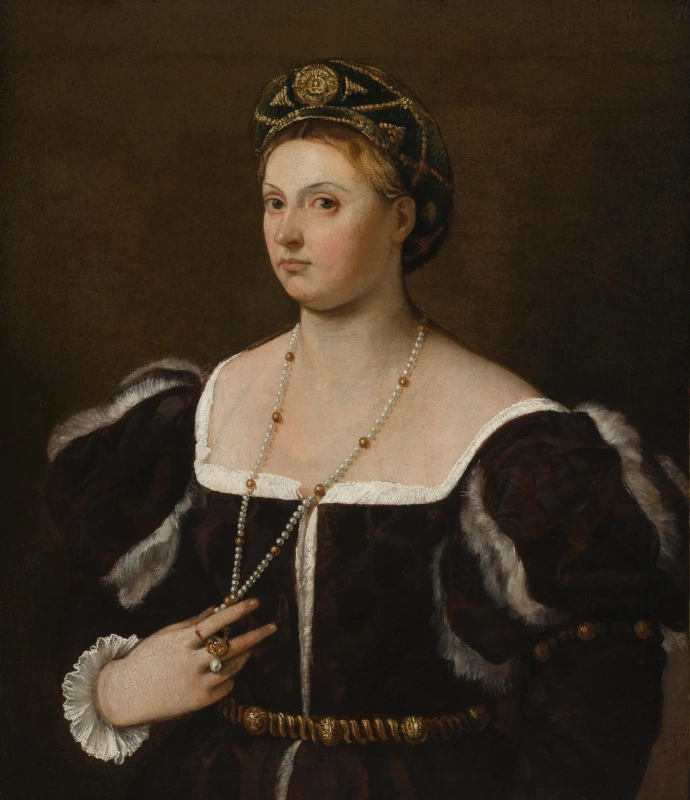
I wanted something in the style of 16th century portraits, but wasn't trying to recreate a specific piece- I just need something to go with my wardrobe! So the first thing I did was look at a bunch of portraits. Google Images and Pinterest are both great for this, though you should always be sure to check that the image you're looking at is from the right region and period! Pro tip: know the names of a few portrait artists from the right time and place for what you're making. This makes searching easier, because you can search for "artist name portraits" rather than "time, region portraits." This generally gets you much more relevant results. I most commonly do 16th century Venetian clothing, so when I need images, I search "Titian portraits."
.jpg) |
| Portrait of a Lady (La Schiavona), Titian |
 |
| Another Portrait of a Lady, also Titian |
 |
| The Lute Player, Andrea Solario, c 1510 |
I found mostly just plain coral necklaces, beads all fairly large and the same size, but there were quite a few coral with pendants, a few coral and gold beads, and the occasional coral and pearl, like the one on the right. There were also a few cases of pearls with gold beads or other stones, like the unnamed lady above. Since I was just trying to get the look without recreating a specific piece, I decided that the fact that mixed bead necklaces were definitely a thing gave me enough room to play around and design something.
 |
| Deciding how to string my necklace. So many possibilities! I'll just have to make another! |
I had ordered coral and faux pearl beads in two different sizes a couple of weeks ago when I gave up on finding anything that looked right for a reasonable price, so I messed around with stringing those until I came up with a pattern I liked. I then cut two pieces of black ribbon long enough to make a bow (I'm pretty certain I've seen this in 16th century Italian portraits, and I didn't have any clasps on hand!) I used poly satin ribbon, so I finished the ends by melting them slightly, and then I folded one end of one of the ribbons over as if I was hemming it. I threaded the smallest needle I could find with a long piece of very skinny perle cotton, tied a knot, and made a couple of stitches through the folded end of the ribbon. I then tied another knot and started stringing the beads, tying knots on either side on the tiny pearls but not bothering with them around the large coral beads after I found that the holes in these beads were bigger than the knots.
Once I knew what I was doing, this project went really quickly! It took me about 45 minutes to string all the beads and finish the end. It's really unusual for my research step to take a lot longer than actually making the piece, so that was fun! I will definitely be doing this again soon, though I intend to get real beading thread before I do that (I think that's part of why the knotting didn't really work properly), and either historical looking clasps or some silk ribbon. I really like how this piece turned out, though! Now I just need some earrings to go with it...
 |
| Plenty of beads for more jewelry! Yay! |

No comments:
Post a Comment