Tuesday, May 26, 2020

Renfaire 2020 Progress Report


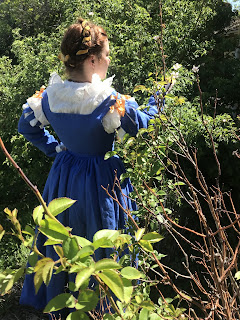
After finishing my ruff yesterday, I decided to try on my entire Venetian ensemble- hair and all- to see what I still need to do before the Colorado Renaissance Festival starts.  Sure, it's been delayed until August because of the pandemic, but what if I need to shop around for a while for something?  So I did my hair and put on my whole outfit, took some cute pictures, and wore it around my house for a while.  I concluded that I need a couple of things to complete the look:

  • Earrings.  The ones I wore for the pictures sort of work, but aren't really right for the 16th century.  
  • More rings.  I own a lot of rings, but most of them were purchased at highland games, and definitely don't look right for the Italian Renaissance!  I only have two that work, and would like more.  
  • A veil.  Italian ladies are usually depicted with their hair uncovered, but often have a fine silk veil pinned in to their elaborate hairstyles.
  • A mask.  We're all probably going to have to wear them this year, so I might as well do it properly and find something that looks "period."  More research required here.
  • An underskirt of some kind.  Maybe a corded petticoat or farthingale?  my skirt could use more volume!  Again, more research is required.
I also decided I need a couple of things that don't really show but would make my life easier:
  • Drawers.  I have no intention of wearing bike shorts under this dress, and drawers are the renaissance solution.
  • Garters.  I'm going to be too busy at faire to pull my socks up every few minutes!
  • A pocket.  I have one, but the tie is red, and would show under this dress, so I need to make one with a white tie!  Edit: my pocket is done!
And naturally, there were a couple of things about my outfit that weren't quite working as intended:
  • My sleeves are a little too tight at the tops, which is causing them to slide down and pull the dress straps with them.  This should be a pretty easy fix.
  • I should probably get a slipperier ribbon than the velvet one I used for my hair.  It works, but silk would be easier to use!
  • My camica sleeves are too long!  This is another easy fix.
All in all, though, I'm really happy with my progress on this outfit!  Things are coming together well, and I should have no trouble getting the things I need done before August!


Monday, May 25, 2020

Venetian Partlet/ Falling Ruff

My new Venetian partlet/ falling ruff!


The ruff is probably the most quintessential piece of late 16th century fashion, but as far as I can tell, the big round dinner plate ruffs you see in late Elizabethan England were never common in Venice, and in the 1560s and '70s, the "ruff" seems to be more of a ruffle attached to the partlet.  Since most of my wardrobe is mid-century Venetian, I decided to make one of these.

The Venetian "falling ruff" is pretty common in portraits from the second half of the 16th century, as are partlets with no ruffle.  Some of the partlets appear to be linen, and others appear to be sheer silk, though the ruff almost always appears to be linen and/or lace.  This leads to the interesting idea that perhaps some ruffs were detachable, and not an integral part of the partlet, but for the sake of simplicity, I decided to make mine one piece.  I may make another one in the other style at a later date, though, in a fancier fabric.

Francesco Montemezzano, 1565-75
This partlet/ruff appears to be linen, trimmed
in lace.  I think I got pretty close to this look!
For this partlet/ruff, I'm using the same sheer white linen I use for 16th century chemises.  I used it for a ruffle collar on an Elizabethan chemise once, and it worked well for that, so why not, right?  It's not going to be completely plain, though!  Many of the partlets and ruffs in portraits appear to be decorated, often with pearls, lace, or blackwork or metallic embroidery.  I'm not very good at embroidery and mostly see pearls on collarless partlets, so I'm using some lace to make this elegant enough to go with the silk gown I'm planning.


The internet, Tudor Tailor, and common sense tell me a partlet pattern looks something like this:


Two front pieces and one back piece, in this case with a rectangular collar and a ruffle.  The measurements on my diagram are mine.  Shoulder seam to neck, and top of shoulder to underbust for the front, Shoulder seam to shoulder seam for the back, and collar bone to collar bone around the back for the collar.  Venetian partlets in portraits usually appear to have a v-neck effect, so I made my pieces a little narrow at the top and wider at the bottom.  There should also be a small semicircle cut out of the middle of the back top to accommodate the neck.  I'm going to do that when I have the shoulders sewn up, though, because I'd rather eyeball it than do math.  I'm also opting to make ties for the bottom out of ribbon rather than sewing them, because this makes my life a lot easier.  Some people pin their partlets on, or just make them long enough that they stay in place, but I prefer ties at the sides, so that's what I'm doing.


Very long ruffle, stitched together and
hemmed.  See my tiny (less than 1/2
inch) seam?
First, I attached the front pieces to the back with flat felled seams at the shoulders.  This is my favorite method of finishing seams because it hides all the raw edges without the bulk of French seams, but if you prefer French seams, they're also common in period.  Next, I tried on the partlet and cut out the back neckline.

Then I moved on to the ruffle.  I cut out my ruffle in several pieces to conserve fabric, resulting in a total length of about 48 inches, 4 times the length of the collar.  Since it was in pieces, the first step was to sew the pieces together, again with flat felled seams.  I then hemmed one side and both ends, and then attached the lace.

Sewing on the lace!
This is how the ruffle looks pinned to
the neck band.  Time to stitch!
Next, gathering the ruffle into the neck band.  Using very small gathering stitches, I gathered the ruffle to the length of the neck band. Then I pinned and stitched the ruffle to one of the neck band pieces.  This was kind of a pain.  Normally, I would use a whip stitch and be sure to catch either side of each pleat, but I was worried about the raw edges of this delicate linen holding up and wanted a bigger seam allowance, so instead, I stab stitched the two together, still stitching on either side of each tiny pleat.  Kind of annoying, especially since the edges of the lace kept catching the thread, but it worked.
Whip stitching the ruffle to
the neck band.

Then I sewed the neck band to the partlet, leaving seam allowances free at either end.  In retrospect, I should have pinned both neck pieces to the ruffle at the same time, but I didn't think about that until the first one was sewn on already, so the next step was attaching the second neck band piece to the ruffle.  This time, I just pinned the pieces right sides together and whip stitched over the edges, which was a mistake- I missed some of the raw edges of the ruffle, and had to go back and redo sections.  This may not have been a problem if I had been more careful the first time, but then again, I couldn't see all the layers very well.

Finally, I just had to attach the second neck band piece to the partlet.  I did this by folding the raw edges under and using tiny whip stitches, making the stitches as invisible as possible.  I put this seam on the outside of the partlet rather than the inside like I normally would because the ruffle falls over this seam, so it's actually less visible than the inside of the neck band.  This is also the side of the ruffle with visible stitching attaching the lace and holding the pieces together.  The outside of the ruffle is the underside, so this won't show when it's being worn.

Using small stitches to attach
the neck band to the partlet.
Once all the pieces were sewn together, all the "tricky" parts of this project were done!  Now all I had to do was hem the partlet and add the underarm ties and trim on the neckline.  Nothing complicated here, so this all went pretty quickly.

That's it!  All done!  One step closer to a complete mid-16th-century Venetian ensemble!


One step closer to a complete ensemble!


Saturday, May 16, 2020

14th Century Martial Surcoat

He didn't feel like putting on his mail, but it fits
over the gambeson, which is the important part!


This project started as my brother's Halloween costume last year, but as usual, things got a little out of hand...

I made a very hastily constructed (raw edges everywhere!) surcoat in just a couple of days- I finished it the morning of- for my brother to wear over his armor on Halloween last year, but I wasn't satisfied with the finished product.  It looked ok, but a lot of things about it aren't great.  It's made in a cheap, lightweight linen/rayon blend that doesn't really drape well, I didn't have time to finish the interior seams, and the applique device on the front was extremely rushed, so it's not really done properly.  So since I apparently can't let imperfection go, I decided to make a better one.  

The cheaply and quickly made
Halloween costume
version.  You can't tell here,
but the dragon is starting to fray.
My brother had designed his arms hastily in order to have the costume in time for Halloween, but upon further consideration, completely changed the color scheme, so rather than the blue surcoat with the red and white dragon, we now have a red surcoat with a "gold"- which is apparently what we call yellow in heraldry- dragon.  I'm going to say right now that while I write this blog specifically to help others with historical costuming, please don't copy my brother's personal arms!  I'd love for people to follow this procedure to make their own clothes, but the arms are individual!  Design your own, and have fun with it!  Need help, or don't feel comfortable making your own garment or designing arms?  I take commissions, and I'm sure I can get my brother, who, unlike me, can draw and knows a lot about heraldry, to help with the designing bit.  Don't hesitate to reach out!
I did most of the construction of the actual garment back in December, and didn't take pictures, so I'll do my best to describe the process.  

I started out with the same pattern I used for Halloween.  I found it online at La Cotte Simple, which is a great resource for all your medieval garment needs!  She has two surcoat patterns, one with and one without side gores.  The one with gores is likely more historically accurate, since medieval fabrics were much narrower than modern ones, so I chose that one.  The other one is simpler, probably goes more quickly, and I'm sure it looks good over armor too, but I was going for accuracy here!  

I used about 2.5 yards of heavyweight linen for the surcoat itself, which is probably what they were made of in period.  For reference, the wearer is 6' tall.  How much fabric you need for the decoration obviously varies depending on what you're doing.  I found 2 remnants totaling about 1 yard of white linen, but was unable to find one of the yellow, so I just ordered a yard when the color I wanted was on sale.  I really only needed a little for the dragon, so now I have almost a yard of yellow linen left over for sleeves or something.  

I cut out the front and back panels and the triangular side gores.  Then I cut out the neck opening and a bit at the shoulders of the big panels.  I pinned in the gores and stitched the pieces together, then flat felled the seams.  This technique was used in period, and it's my favorite method of finishing seams because it encloses the raw edges completely without being bulky like French seams.  It's also really easy to do.  You just trim down one of the seam allowances, then fold the other over it, tucking the raw edges under, and stitch!

Flat felling a seam:


1. Sew the seam with a running stitch, then cut down one seam allowance
2. Fold the other side over and pin down
3. Stitch!

Then I cut the slits in the front and back panels and hemmed them, but didn't hem the bottom of the garment yet.  I wanted to try it on the wearer first to make sure my hem was even all the way around, but because I was planning to add a white piece around the shoulders, I hadn't done the shoulder seams yet.  I also realized after cutting out the red fabric that the shoulders were much too marrow, which is what I get for cutting things out when I'm tired.  So I decided to fix this by making the white piece wider, and wanted to finish the shoulders once I added that.  If you don't have any extra pieces to add here, this would be the time to hem the bottom too.

Before doing that, though, I decided to add the decorations.  This is the tricky part.  Embroidery is really not my strong suit!  So when my brother asked for the dragon to be embroidered on, the answer was absolutely not!  In seriousness, though, applique was a very common method of decorating clothing in the medieval period, so I think this is more likely the way it would have been done.  

The first thing I did was the white bit around the shoulders.  I cut out my pieces and pinned them to the surcoat, rolling the raw edges under.  I then whip stitched the white fabric in place using white perle cotton thread.  I decorated the tips of the zigzags by making my stitches right next to each other.  Nothing crazy- I'm embriodery challenged, and wanted to keep things simple!

We have a dragon!
So.  Many.  Pins.  Definitely
stabbed myself a lot doing this!


Then I cut out the dragon.  I can't draw, so my brother made me a printout of the device (the dragon and sword) to use as a pattern.  I left off the small parts like the horn and the tongue, since cutting those out with a seam allowance was going to be too difficult, and figured I'd add them back on in embroidery at a later stage.  I then pinned the dragon and the sword to the front of the surcoat, again making sure to turn under the raw edges, and stitched them in place with regular thread that matches them.  Next, I went back over that with backstitch in thin, black perle cotton, adding the fine lines of the design.


Maybe one day I'll actually
invest in a bigger embroidery
hoop... Adjusting constantly
is kind of annoying.
The lines on the dragon's belly and wings were added with just a single line of backstitch in thin perle cotton thread.  I added the horn, claw, and tongue at this stage by outlining them with backstitch and then going back and filling them in with satin stitch in the same thread.  I used an embroidery hoop for this step to stabilize my fabric, since I'm dealing with a lot of small detail and actually drawing with the thread here.  On simpler embroidery like I did over the edges of the white piece, I don't bother.  Ideally, the hoop is big enough to contain your whole design, but I only own one, so that's what I used.  I had to move the hoop around a lot, but I'm not really doing anything detailed enough for that to matter. 

Once this step was done, I got rid of the hoop and whip stitched over the edges with the same embroidery thread, keeping my stitches very close together.  This created a thick black line around the outside of the device.  I have no idea if this is a correct technique for medieval clothing, but it looks nice.  Once this was done, I moved on to the squiggly white line (apparently the technical term is either "fess" or "bar wavy", but I didn't know that either!) around the waist of the surcoat, which I attached the same way I had the zigzaggy piece at the top.  If I'd thought about it before I got halfway through this section, I would have used a much thinner perle cotton than I did to still get the decorative effect with less effort, but oh well.  I like how the thicker one looks anyway.
Finishing the neckline

Finally, I just had to finish the neckline, shoulder seams, and hem.  I did the neckline by turning the raw edges of the white and red fabrics towards each other and hem stitching them together.  I then did the shoulder seams the same way I did the other interior seams, by flat felling for both strength and finishing raw edges.  Finally, I rolled the raw edges of the bottom in and hemmed, using buttonhole stitch around the tops of the front and back slits.  And that's it!  I'm pleased with how this turned out, though I think I made the back slit a little too high.  It's even with the front one, but when it's worn, I think it looks long, so next time, I'll probably make it a couple of inches shorter.


Monday, May 11, 2020

Fifteenth Century Pasta!!

Renaissance dinner!  This is what happens when I'm not allowed
to go to restaurants to try new things...


I write this blog because I'm curious not just about the major events of history, but about what life was like in the past.  Honestly, I care less about who was on which European throne in a given year than about how people lived.  Obviously, this covers a wide range of topics, and the one that interests me most is generally fashion, but I also really love food, so I decided to investigate some historical cooking!

I've been as bored as everyone else in quarantine, so I recently subscribed to The Great Courses, because what else is a housebound amature historian to do, and watched a lecture series on the history of food by Dr. Ken Albala.  One of the recipes from Renaissance Italy featured in this series is for pasta with pancetta (Italian bacon- you can use regular bacon instead), sugar, cinnamon, and cheese, and I was intrigued, so I tried it.  And it was really good!  And easy!  I would definitely do it again, and even my very picky brother liked it!

If you've delved into medieval and renaissance cuisine at all, you're probably aware that sugar and spices were used all the time, on or in practically every dish on upper-class tables.  This is because these ingredients came from far away (Asia and the Indian subcontinent, mostly), making them both exotic and very expensive.  This was a cuisine based around conspicuous consumption, and the spice trade was the main source of Venice's wealth in the Renaissance.  In fact, the spice trade was so lucrative in this period that the age of exploration was sparked in large part by Portugal trying to break Venice's monopoly on spices!  And no, despite what you may have been told in school, the spices were not needed to mask the taste of rotting meat.  Gross!  If that were the case, we probably wouldn't have survived the middle ages because everyone would have died of food borne illnesses! 

This particular dish is pretty typical of fifteenth century Italian cooking in its use of spices and sugar.  Keep in mind that what we today think of as traditionally Italian tomato sauce isn't available yet, since tomatoes are a new world plant, and weren't really seen in European cooking until the late sixteenth century.  It's weird to think about, isn't it?

This dish was really easy to prepare.  Dr. Albala made his own fresh pasta for this dish, but I didn't feel like taking the time to do that this time, so I used store bought fettuccine.  I cooked and drained my pasta.  Then I cooked some cubed pancetta in a saucepan, adding a bit of sugar (I was cooking for just me, and used maybe a tablespoon?  I just grabbed a small handful and didn't measure) and a generous amount of cinnamon, plus a dash of nutmeg when it was nearly done.  I did cheat a little by adding the nutmeg and using a tiny splash of heavy cream when I thought it needed a little more moisture, but both those ingredients are seen in these sorts of dishes in period, so I'm ok with it!  Finally when the pancetta was cooked, I added a generous amount of grated parmesan cheese and then mixed in my pasta.  I served it with more grated cheese and cinnamon on top.  

I know this sounds weird to modern tastes, but it was really good!  The sugar and spices glaze the pancetta, and the sweetness goes really nicely with the creamy, salty cheese.  I would definitely recommend trying this if you're at all curious about Renaissance dining!  I also highly recommend the lecture series I got the recipe from, Cooking Across the Ages, from The Great Courses, if you're quarantined and looking for something cool to watch.  He covers everything from ancient Rome to the 1980's, giving cooking demos from each period.  It's a really interesting look into one of the most basic human activities through history. 

Monday, May 4, 2020

Coral Neckalce


No 16th century lady's ensemble is complete without jewelry, but so much of what is marketed as "Renaissance" on the internet is definitely not historically correct for the Renaissance (or any time, really), so I decided to try to make my own!  And it actually turned out well!  I'm not a jeweler, and won't be trying any metalworking or anything complicated anytime soon, but if I can do this, you can too!  

I wanted something in the style of 16th century portraits, but wasn't trying to recreate a specific piece- I just need something to go with my wardrobe!  So the first thing I did was look at a bunch of portraits.  Google Images and Pinterest are both great for this, though you should always be sure to check that the image you're looking at is from the right region and period!  Pro tip: know the names of a few portrait artists from the right time and place for what you're making.  This makes searching easier, because you can search for "artist name portraits" rather than "time, region portraits."  This generally gets you much more relevant results.  I most commonly do 16th century Venetian clothing, so when I need images, I search "Titian portraits."  

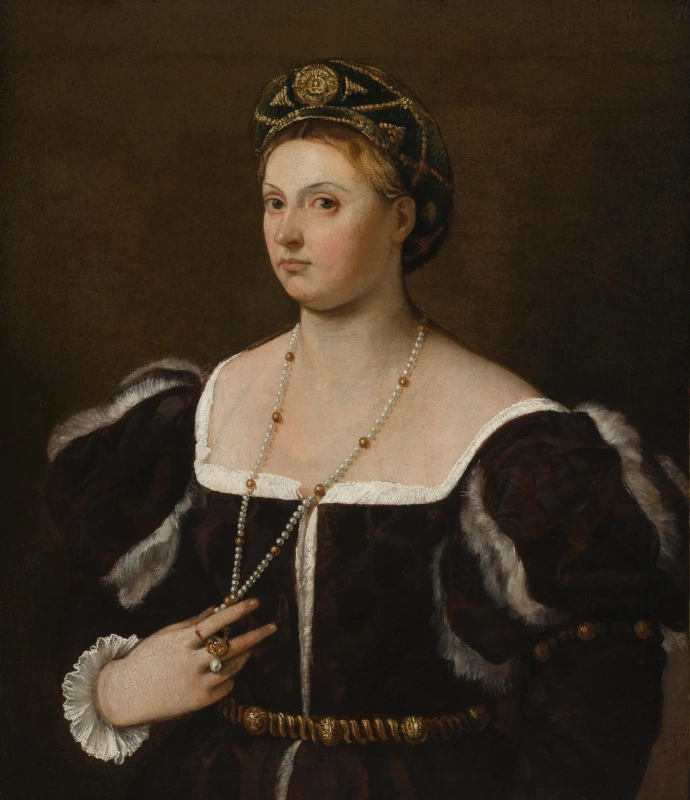
Portrait of a Lady ('La Schiavona') - Titian
Portrait of a Lady (La Schiavona),
 Titian
Titian Vecelli. Portrait of a Woman
Another Portrait of a Lady,
also Titian
The vast majority of the wealthy ladies Titian painted wore pearls when they sat for their portraits, but that's OK because my main goal was to look at the styles of jewelry these ladies were wearing, not the type of stone.  While there were a few long necklaces like the one the lady on the right wears, most of the mid century portraits feature shorter chokers like the one on La Schiavona.  Since this style is both more common and less likely to drive me insane when wearing it, I decided to go with the choker.  The next step was to decide whether to mix the coral beads, or just string a bunch of the same.  Time for more portraits!

Andrea Solario (Italian Renaissance painter, active 1495-1524) A Woman with a Lute c 1510 (2)-1
The Lute Player,
Andrea Solario, c 1510
I found mostly just plain coral necklaces, beads all fairly large and the same size, but there were quite a few coral with pendants, a few coral and gold beads, and the occasional coral and pearl, like the one on the right.   There were also a few cases of pearls with gold beads or other stones, like the unnamed lady above.  Since I was just trying to get the look without recreating a specific piece, I decided that the fact that mixed bead necklaces were definitely a thing gave me enough room to play around and design something.  

Deciding how to string my
necklace.  So many possibilities!
I'll just have to make another!
I had ordered coral and faux pearl beads in two different sizes a couple of weeks ago when I gave up on finding anything that looked right for a reasonable price, so I messed around with stringing those until I came up with a pattern I liked.  I then cut two pieces of black ribbon long enough to make a bow (I'm pretty certain I've seen this in 16th century Italian portraits, and I didn't have any clasps on hand!)  I used poly satin ribbon, so I finished the ends by melting them slightly, and then I folded one end of one of the ribbons over as if I was hemming it.  I threaded the smallest needle I could find with a long piece of very skinny perle cotton, tied a knot, and made a couple of stitches through the folded end of the ribbon.  I then tied another knot and started stringing the beads, tying knots on either side on the tiny pearls but not bothering with them around the large coral beads after I found that the holes in these beads were bigger than the knots.  

Once I knew what I was doing, this project went really quickly!  It took me about 45 minutes to string all the beads and finish the end.  It's really unusual for my research step to take a lot longer than actually making the piece, so that was fun!  I will definitely be doing this again soon, though I intend to get real beading thread before I do that (I think that's part of why the knotting didn't really work properly), and either historical looking clasps or some silk ribbon.  I really like how this piece turned out, though!  Now I just need some earrings to go with it...

Plenty of beads for more jewelry!  Yay!
It also cost me a lot less to make this necklace than buying a similar one would have.  The lowest price I saw on a decent looking one online was around $25, plus shipping.  I found the beads on Etsy for $25, including shipping, and had the ribbon and thread on hand.  All told, I used about $10 worth of product for this necklace, and I have beads left over for at least 2 more different ones (I used almost all the large corals).  That's 3 for the price I would have paid for one!  And I, with no real jewelry-making experience, did it in an afternoon, with no major issues!  I'm very glad I decided to try this!