 |
| He didn't feel like putting on his mail, but it fits over the gambeson, which is the important part! |
This project started as my brother's Halloween costume last year, but as usual, things got a little out of hand...
I made a very hastily constructed (raw edges everywhere!) surcoat in just a couple of days- I finished it the morning of- for my brother to wear over his armor on Halloween last year, but I wasn't satisfied with the finished product. It looked ok, but a lot of things about it aren't great. It's made in a cheap, lightweight linen/rayon blend that doesn't really drape well, I didn't have time to finish the interior seams, and the applique device on the front was extremely rushed, so it's not really done properly. So since I apparently can't let imperfection go, I decided to make a better one.
 |
| The cheaply and quickly made Halloween costume version. You can't tell here, but the dragon is starting to fray. |
I did most of the construction of the actual garment back in December, and didn't take pictures, so I'll do my best to describe the process.
I started out with the same pattern I used for Halloween. I found it online at La Cotte Simple, which is a great resource for all your medieval garment needs! She has two surcoat patterns, one with and one without side gores. The one with gores is likely more historically accurate, since medieval fabrics were much narrower than modern ones, so I chose that one. The other one is simpler, probably goes more quickly, and I'm sure it looks good over armor too, but I was going for accuracy here!
I used about 2.5 yards of heavyweight linen for the surcoat itself, which is probably what they were made of in period. For reference, the wearer is 6' tall. How much fabric you need for the decoration obviously varies depending on what you're doing. I found 2 remnants totaling about 1 yard of white linen, but was unable to find one of the yellow, so I just ordered a yard when the color I wanted was on sale. I really only needed a little for the dragon, so now I have almost a yard of yellow linen left over for sleeves or something.
Flat felling a seam:


1. Sew the seam with a running stitch, then cut down one seam allowance
2. Fold the other side over and pin down
3. Stitch!
Then I cut the slits in the front and back panels and hemmed them, but didn't hem the bottom of the garment yet. I wanted to try it on the wearer first to make sure my hem was even all the way around, but because I was planning to add a white piece around the shoulders, I hadn't done the shoulder seams yet. I also realized after cutting out the red fabric that the shoulders were much too marrow, which is what I get for cutting things out when I'm tired. So I decided to fix this by making the white piece wider, and wanted to finish the shoulders once I added that. If you don't have any extra pieces to add here, this would be the time to hem the bottom too.
Before doing that, though, I decided to add the decorations. This is the tricky part. Embroidery is really not my strong suit! So when my brother asked for the dragon to be embroidered on, the answer was absolutely not! In seriousness, though, applique was a very common method of decorating clothing in the medieval period, so I think this is more likely the way it would have been done.
The first thing I did was the white bit around the shoulders. I cut out my pieces and pinned them to the surcoat, rolling the raw edges under. I then whip stitched the white fabric in place using white perle cotton thread. I decorated the tips of the zigzags by making my stitches right next to each other. Nothing crazy- I'm embriodery challenged, and wanted to keep things simple!
 |
| We have a dragon! |
 |
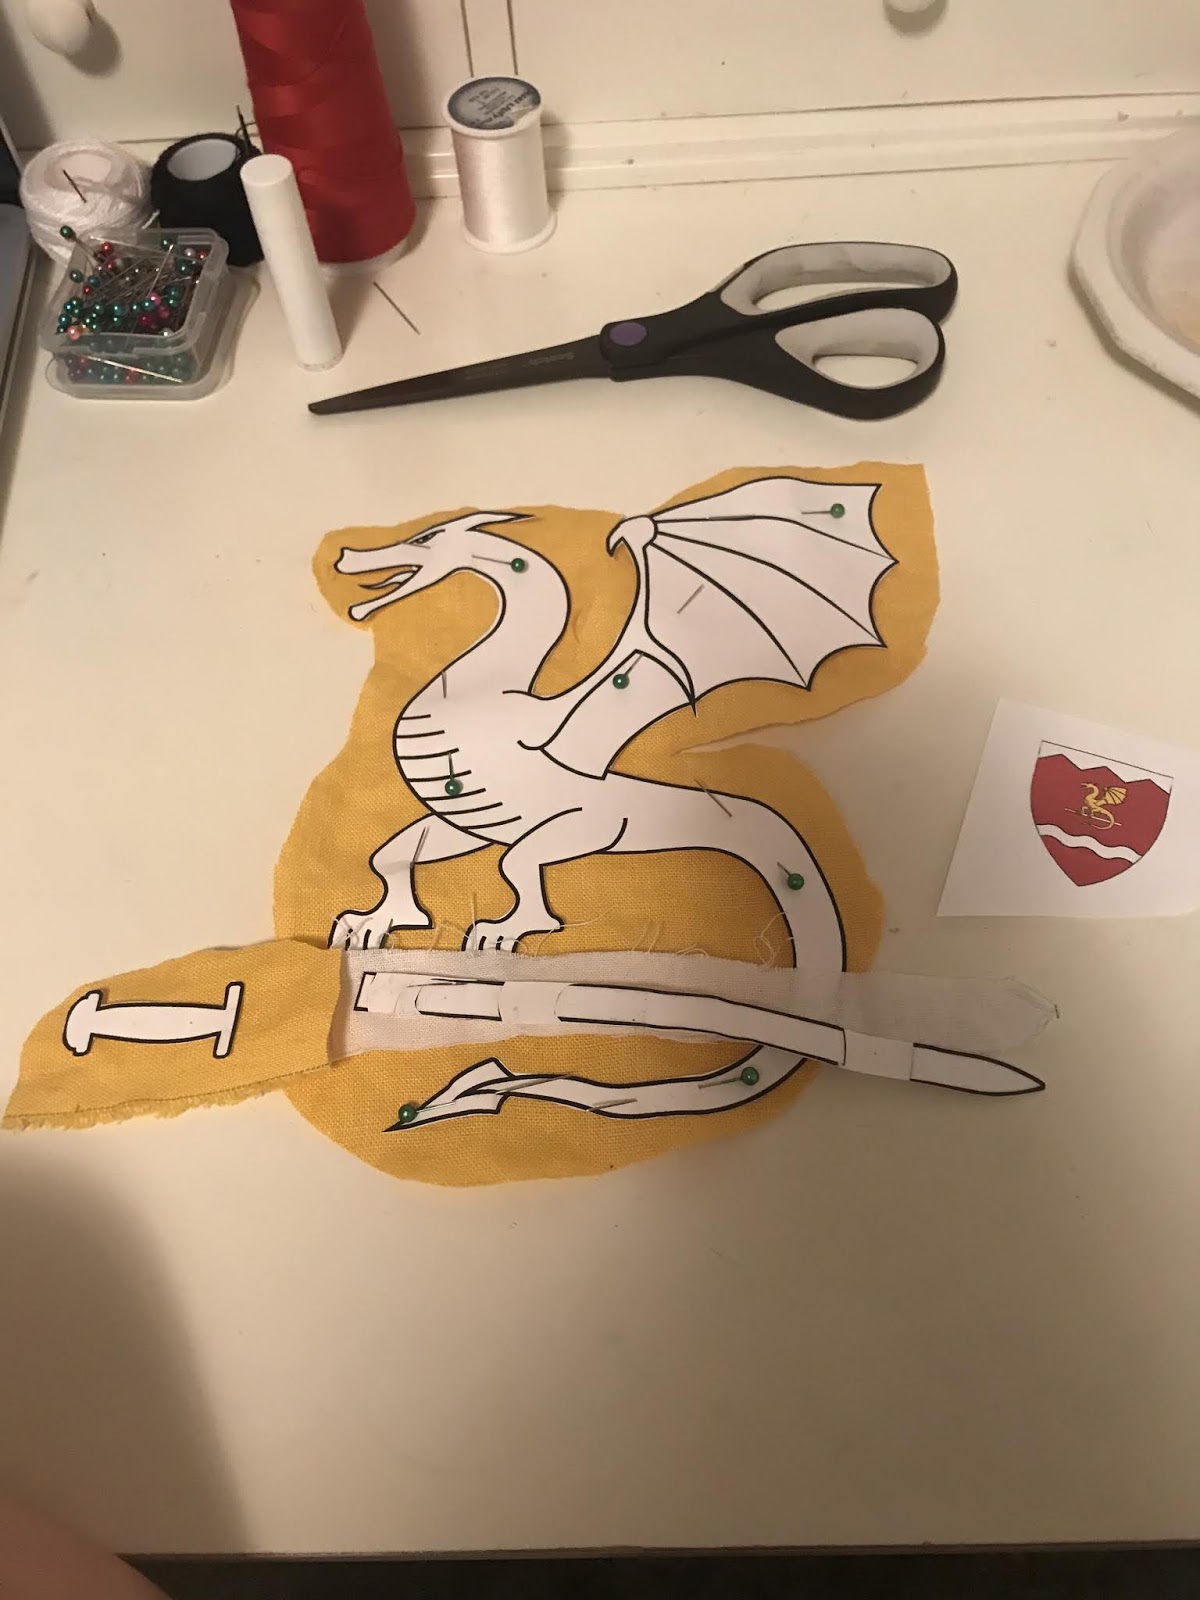
| So. Many. Pins. Definitely stabbed myself a lot doing this! |
Then I cut out the dragon. I can't draw, so my brother made me a printout of the device (the dragon and sword) to use as a pattern. I left off the small parts like the horn and the tongue, since cutting those out with a seam allowance was going to be too difficult, and figured I'd add them back on in embroidery at a later stage. I then pinned the dragon and the sword to the front of the surcoat, again making sure to turn under the raw edges, and stitched them in place with regular thread that matches them. Next, I went back over that with backstitch in thin, black perle cotton, adding the fine lines of the design.
The lines on the dragon's belly and wings were added with just a single line of backstitch in thin perle cotton thread. I added the horn, claw, and tongue at this stage by outlining them with backstitch and then going back and filling them in with satin stitch in the same thread. I used an embroidery hoop for this step to stabilize my fabric, since I'm dealing with a lot of small detail and actually drawing with the thread here. On simpler embroidery like I did over the edges of the white piece, I don't bother. Ideally, the hoop is big enough to contain your whole design, but I only own one, so that's what I used. I had to move the hoop around a lot, but I'm not really doing anything detailed enough for that to matter.
Once this step was done, I got rid of the hoop and whip stitched over the edges with the same embroidery thread, keeping my stitches very close together. This created a thick black line around the outside of the device. I have no idea if this is a correct technique for medieval clothing, but it looks nice. Once this was done, I moved on to the squiggly white line (apparently the technical term is either "fess" or "bar wavy", but I didn't know that either!) around the waist of the surcoat, which I attached the same way I had the zigzaggy piece at the top. If I'd thought about it before I got halfway through this section, I would have used a much thinner perle cotton than I did to still get the decorative effect with less effort, but oh well. I like how the thicker one looks anyway.
Finally, I just had to finish the neckline, shoulder seams, and hem. I did the neckline by turning the raw edges of the white and red fabrics towards each other and hem stitching them together. I then did the shoulder seams the same way I did the other interior seams, by flat felling for both strength and finishing raw edges. Finally, I rolled the raw edges of the bottom in and hemmed, using buttonhole stitch around the tops of the front and back slits. And that's it! I'm pleased with how this turned out, though I think I made the back slit a little too high. It's even with the front one, but when it's worn, I think it looks long, so next time, I'll probably make it a couple of inches shorter.
 |
| Maybe one day I'll actually invest in a bigger embroidery hoop... Adjusting constantly is kind of annoying. |
Once this step was done, I got rid of the hoop and whip stitched over the edges with the same embroidery thread, keeping my stitches very close together. This created a thick black line around the outside of the device. I have no idea if this is a correct technique for medieval clothing, but it looks nice. Once this was done, I moved on to the squiggly white line (apparently the technical term is either "fess" or "bar wavy", but I didn't know that either!) around the waist of the surcoat, which I attached the same way I had the zigzaggy piece at the top. If I'd thought about it before I got halfway through this section, I would have used a much thinner perle cotton than I did to still get the decorative effect with less effort, but oh well. I like how the thicker one looks anyway.
 |
| Finishing the neckline |
Finally, I just had to finish the neckline, shoulder seams, and hem. I did the neckline by turning the raw edges of the white and red fabrics towards each other and hem stitching them together. I then did the shoulder seams the same way I did the other interior seams, by flat felling for both strength and finishing raw edges. Finally, I rolled the raw edges of the bottom in and hemmed, using buttonhole stitch around the tops of the front and back slits. And that's it! I'm pleased with how this turned out, though I think I made the back slit a little too high. It's even with the front one, but when it's worn, I think it looks long, so next time, I'll probably make it a couple of inches shorter.
No comments:
Post a Comment